For those of you who will be buying a Washer & Dryer in the near future, you should know that many times they come with free install. However, if you buy on Craig's List or on a weekend where install isn't free, just do it yourself. It's really not hard at all and it will save you some money. Lowe's was actually offing free install this past weekend, but we would have had to wait a while for them to deliver/install the appliances and we wanted to use them right away. Plus I don't know how the free install works when you drive to Spring to buy everything...something tells me they don't deliver that far.
Anyways, I tried to take as many photos as possible, let's see how this goes.
Step 1:
Buy and bring home a washer and dryer (it helps to have men to move everything)
You will also need to buy some supplies. You need a dryer plug, washing machine connectors, and a dryer to vent hook up kit (pictured later).
Let's start by hooking up the dryer (b/c that's the order we did it and it's easier for me to go through pictures that way :) )
Step 2:
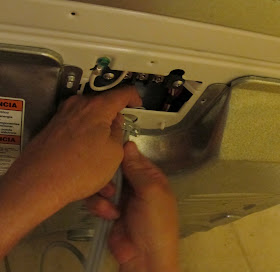
Connect the dryer cord. Apparently Dryers don't come with the power cord now, who knew? This is because there are three different types of outlets that can be in your laundry room. Before going shopping I suggest taking a picture of your outlet so you can buy the right plug. Also, if you buy a used dryer and the plug doesn't work, don't worry, you can replace it. Connecting the plug is as simple as un-screwing and re-screwing some screws. This is this clip in the back that holds the power cord in place. This is so if you pull on the dryer the power cord doesn't just pop off the dryer (like Eeyore's tail). The clip has screws on either side holding it shut. You just unscrew it...
Feed the power cord through, and re-screw it shut.
Then you'll have the three ends of the cord that have these little metal circles at the end.
There are three screws to connect the cord to the dryer. You just unscrew all three (making sure not to drop them into the dryer:
Then put the screw through the metal circle and screw it back in.
Now the electricity can flow through the metal to metal contact. For safety there is a metal plate covering the whole thing. I think it's obvious, but I'll say it anyways... don't plug this sucker in until you're all done. :)
Step 3:
Attach the dryer vent. We started with the cheapest vent they sell. It looked like this:
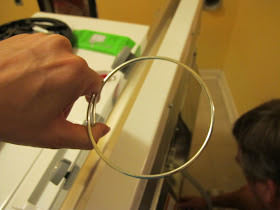
We also bought these connector rings that you squeeze to open:
And then we tried to hook it up. The stupid thing is made out of such cheap materials that it just shredded instead of nicely connecting to the dryer like it should.
So we made a Walmart trip at 10pm because we were determined to get this dryer up and running that night. We ended up buying this one:
Which was much easier to install...just plug it into the dryer
And then into the wall...
What I like about it is that those white pieces keep me from accidentally shoving the dryer against the wall and crushing the hose. I can't accidentally break it = win.
That's pretty much all there is to a Dryer, now on to the Washer...
Step 4:
The washing machine should come with a hose by which the dirty water drains out. It will connect to the bottom of your washing machine...
See those blue rings? Those open by squeezing on them just like the dryer vent hose rings from the cheaper hose above.
Where does the other end of the hose go? It just get shoved into the 'stand pipe'. I thought this was so strange that the pipe is just there open in our wall. But apparently that's pretty normal. It has to be higher than the washing machine to prevent overflow.
Step 5:
Next we use the washing machine connectors..
to hook the water up to the machine. It's pretty easy to see which connector is for hot water and which one is for cold water.
The connecters just screw on to the water supply and then the washing machine. Not much to it.
That's pretty much it! Then everything should work great!
Should... didn't say 'did'... we started the Dryer to test it and found out the drum didn't turn. What a disappointment! But it's under warranty so there is someone coming out to fix it this weekend. Mike and I took the back off the dryer and looked inside and found that this piece was loose, rattling around in there:
It looks like what holds the belt, because the belt is just hanging loos in there:
So it will be a little while until I can dry my clothes...but luckily for my our house came with a close-line in the back. So I was still able to do several loads of laundry, I just went little house on the prairie when it came to drying them.
Project cost: $60 for all the parts
Time: About 20-30 minutes (more if you have to run out and get a new hose)


No comments:
Post a Comment